Disable Integrated Graphics On Gigabyte BIOS: A Quick Guide
For computer enthusiasts, navigating the BIOS settings can be a daunting task. However, when it comes to disabling integrated graphics on a Gigabyte motherboard, understanding the process can be a game-changer. In this article, we'll break down the steps to disable integrated graphics on a Gigabyte BIOS, and explore the benefits of doing so.
Enabling or disabling integrated graphics on a Gigabyte motherboard largely depends on the purpose of the system. For instance, when using the computer for gaming or graphics-intensive tasks, disabling integrated graphics may enhance performance. However, when running applications that require integrated graphics, such as video editing or hardware acceleration, enabling them is recommended. A clear understanding of the BIOS settings and the system's specifications will allow users to make informed decisions.
Disabling integrated graphics on a Gigabyte BIOS involves navigating to the Advanced menu and adjusting the Intel Graphics settings. While the process is relatively straightforward, incorrect settings can lead to system instability or even render the system unbootable. Therefore, users must exercise caution when making changes to the BIOS settings.
Disabling integrated graphics on a Gigabyte BIOS offers several benefits, including:
Disabling integrated graphics can significantly enhance system performance, particularly when running demanding applications that require dedicated graphics processing. By redirecting the system's resources to the dedicated graphics card, the system can achieve higher frame rates and smoother gameplay.
Disabling integrated graphics can also enable overclocking and improve system stability. By eliminating the integrated graphics processing unit (GPU), the system can focus on overclocking the dedicated GPU, resulting in higher clock speeds and improved performance.
Disabling integrated graphics can also lead to improved power management and reduced heat generation. By eliminating the integrated GPU, the system consumes less power and generates less heat, resulting in a longer lifespan for the system's components.
Here's a step-by-step guide to disabling integrated graphics on a Gigabyte BIOS:
Before disabling integrated graphics, ensure that the motherboard drivers are up to date. This can be done by visiting the Gigabyte website and downloading the latest drivers for the motherboard.
BIOS Version
Determine the current BIOS version by accessing the motherboard's built-in BIOS or the motherboard manufacturer's website. For this guide, we will assume the BIOS version is UEFI.
Restart the system and press the DEL key to access the BIOS settings. Alternatively, users can press the F2 key or use the keyboard shortcut Ctrl + F1.
Navigating to the Advanced Menu
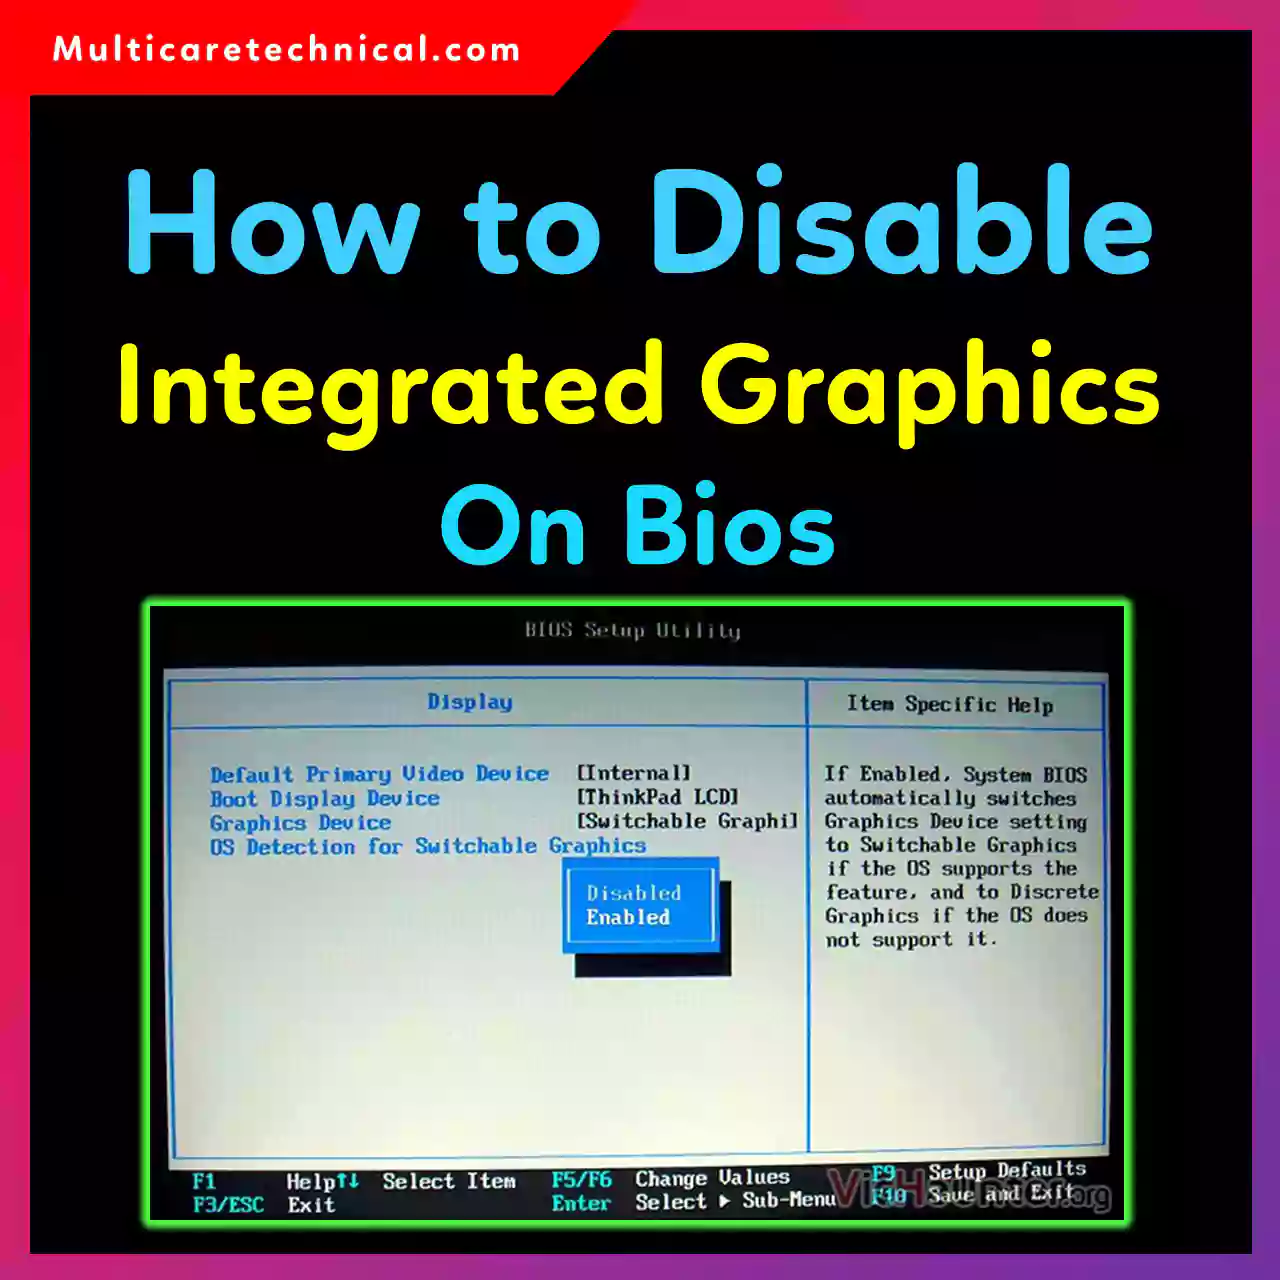
In the BIOS settings, navigate to the Advanced menu by using the direction keys or scrolling through the menu.
Selecting the Intel Graphics Settings
Under the Advanced menu, select the Intel Graphics settings.
Disabling Integrated Graphics
To disable integrated graphics, set the "Graphics Device" setting to "PCI Express". This will disable the integrated graphics processing unit (GPU).
After disabling integrated graphics, save the changes by pressing F10.
While disabling integrated graphics can improve system performance, it may also lead to certain issues, such as:
System Instability
System instability can occur if the system is not designed to run without integrated graphics. In such cases, resetting the BIOS settings to their default values can resolve the issue.
Incorrect Settings
Incorrect settings can lead to system instability or render the system unbootable. Exercise caution when making changes to the BIOS settings.
Dedicated Graphics Card Not Recognized
If the dedicated graphics card is not recognized after disabling integrated graphics, ensure that the card is properly installed and configured.
According to Frederic Lagarde, a senior system engineer at Gigabyte:
"When disabling integrated graphics, it's essential to ensure that the system is properly configured to handle the demands of the dedicated graphics card. This involves updating the motherboard drivers, installing the correct graphics drivers, and adjusting the system settings accordingly."
Consequently, disabling integrated graphics on a Gigabyte BIOS requires a clear understanding of the system's requirements and specifications. While the process is relatively straightforward, incorrect settings can lead to system instability or even render the system unbootable. With this quick guide, users can navigate the BIOS settings with confidence and unlock the full potential of their system.
By following the steps outlined in this guide, users can enhance system performance, enable overclocking, and improve system stability. In addition, disabling integrated graphics can lead to improved power management and reduced heat generation. By understanding the importance of BIOS settings and making informed decisions, users can ensure optimal system performance and longevity.
Whether you're a seasoned gamer or a hardware enthusiast, disabling integrated graphics on a Gigabyte BIOS is a simple yet effective way to improve system performance. By following this quick guide, you can unlock the full potential of your system and take your computing experience to the next level.


Related Post

The Tale of D Deng 1271 Washington Ave: A History of Defining Innovation in a Versatile Electronic Component

Unveiling the Talented Go Ara: Exploring Her Rise to Stardom in Korean Entertainment

Summer Walker's Love Life: Unraveling the Truth Behind Her Relationships

Uncovering the Mysterious Whale Tail Candid: A Photographic Enigma of the Deep


