Securing Your Network with OpenWRT: A Step-by-Step Guide to Setting Up an OpenVPN Server with LuCI
Securing Your Network with OpenWRT: A Step-by-Step Guide to Setting Up an OpenVPN Server with LuCI
The world of home networking has never been more complex, with numerous options and solutions available to ensure security and convenience. One of the most powerful and flexible solutions is OpenWRT, an open-source firmware that allows users to turn their routers into powerful network servers. Among the many features offered by OpenWRT is the ability to set up an OpenVPN server, providing users with a secure and encrypted connection to their network from anywhere in the world. In this article, we will explore the process of setting up an OpenVPN server with LuCI, the user-friendly web interface that comes with OpenWRT.
The setup process is designed to be user-friendly and accessible to even the most novice users, making it an excellent choice for those who want to ensure their network's security without delving into complex technical details. According to OpenWRT's official documentation, the LuCI interface "makes OpenWRT easier to use, with a modern and intuitive web interface that lets you configure and manage your router." This article will walk you through the step-by-step process of setting up an OpenVPN server using LuCI, providing users with a comprehensive guide to securing their network with OpenWRT.
### Requirements and Hardware Recommendations
Before diving into the setup process, it's essential to ensure that your hardware meets the minimum requirements for running OpenWRT. Here are some recommendations:
* A compatible router: OpenWRT supports a wide range of routers from various manufacturers, including TP-Link, Linksys, and Netgear. Check OpenWRT's compatibility list to ensure that your router is supported.
* A computer with internet access: You'll need a computer with an internet connection to download and install OpenWRT on your router.
* LuCI web interface: LuCI comes pre-installed with OpenWRT and can be accessed through a web browser.
### Downloading and Installing OpenWRT
The first step in setting up an OpenVPN server is to download and install OpenWRT on your router. Here's a step-by-step guide:
1. Download the OpenWRT firmware image from the official website. Make sure to select the correct version and architecture for your router.
2. Flash the OpenWRT firmware image onto your router using a tool like LuCI or the command line interface (CLI). This will overwrite the original firmware on your router.
3. Once the installation is complete, restart your router to ensure that the new firmware is loaded.
### Accessing LuCI Web Interface
After installing OpenWRT, you can access the LuCI web interface by opening a web browser and navigating to the IP address of your router. The default IP address is usually `http://192.168.1.1` or `http://192.168.0.1`. You can find the correct IP address by checking your router's documentation or by looking for it on the device itself.
When you access the LuCI web interface for the first time, you'll be prompted to log in using your router's default admin credentials. You can find these credentials in your router's documentation or by searching online.
### Setting Up OpenVPN Server
Once you've logged in to the LuCI web interface, you'll see a menu bar with various options, including "VPN" and "Settings." Click on the "VPN" option and select "OpenVPN" from the drop-down menu.
On the OpenVPN settings page, you'll see several options, including "Server" and "Client." We'll focus on the server settings, which will allow you to configure your OpenVPN server.
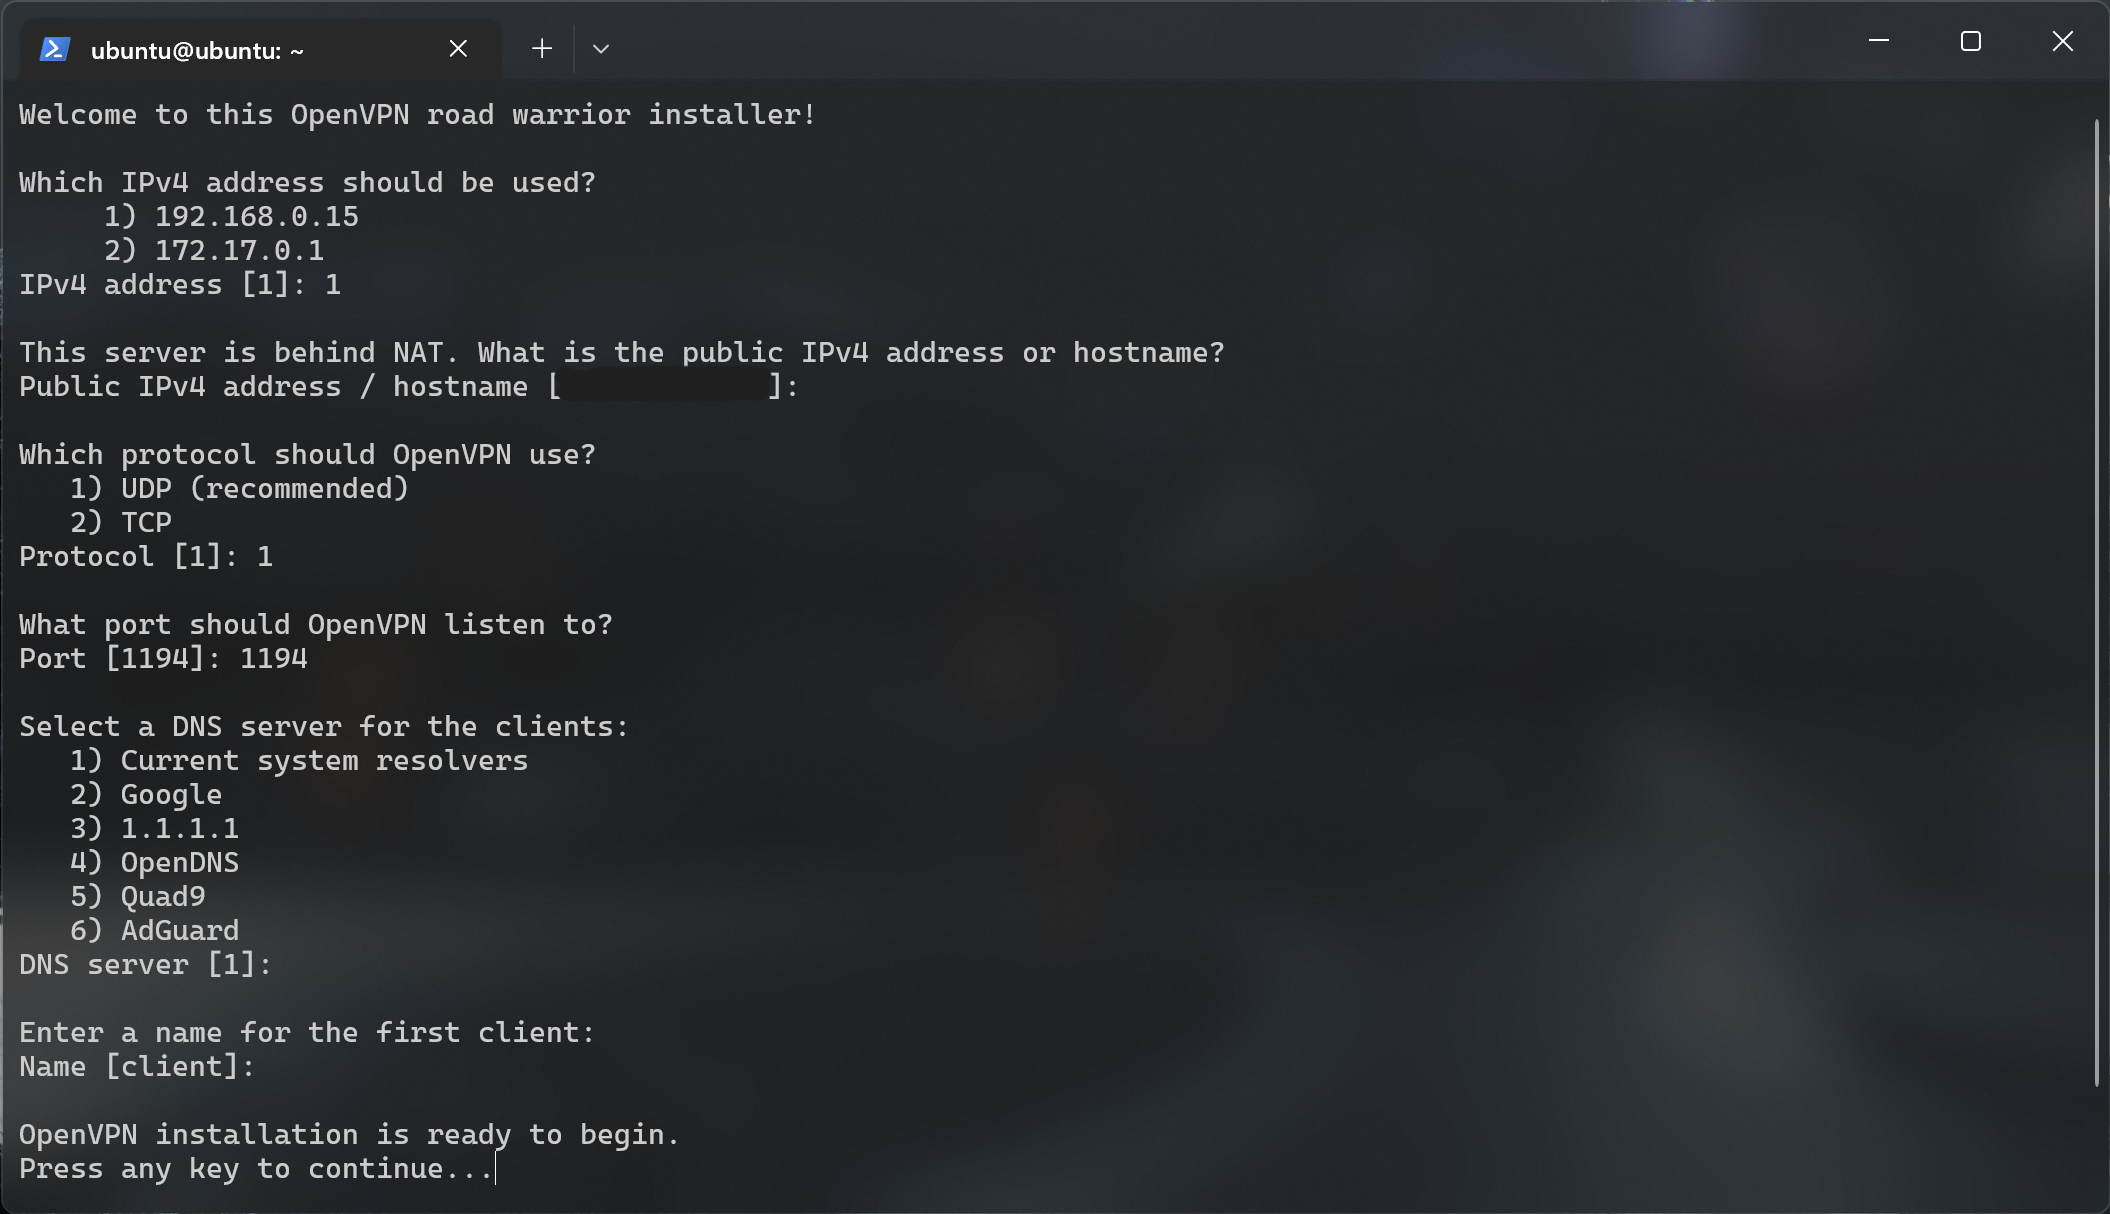
Here are the key settings to configure:
* **Server Mode:** Select "TCP" or "UDP" based on your needs. TCP is generally more secure but may experience higher latency, while UDP is faster but less secure.
* **Port:** Choose a port number for your OpenVPN server. The default port is 1194, but you can choose any available port.
* **Encryption:** Choose the level of encryption for your OpenVPN server. AES-256 is a good choice for maximum security.
* **DH Key Size:** Set the Diffie-Hellman key size to at least 2048 bits for maximum security.
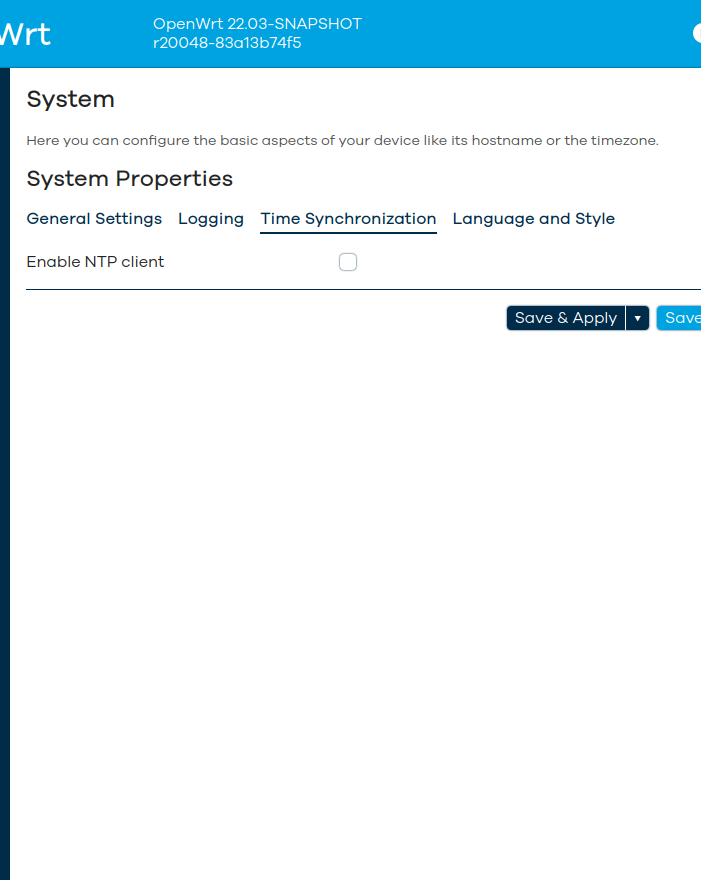
### Configuring Server Settings
To configure your OpenVPN server, click on the "Settings" button next to the server settings. Here, you'll find options to customize your server settings:
* **Network Address:** Set the IP address and subnet mask for your OpenVPN server. This will determine the IP range for your clients.
* **DNS Servers:** Enter the DNS servers that your clients will use.
* **Local Network:** Select the local network interface that your OpenVPN server will use.
* **Route Rules:** Configure route rules to determine how traffic will be routed between your clients and the rest of the network.
### Configuring Client Settings
To configure client settings, click on the "Client" tab on the OpenVPN settings page. Here, you'll find options to customize your client settings:
* **Username and Password:** Enter a username and password for your client to authenticate with the server.
* **Client Certificate:** Upload a client certificate to authenticate the client with the server.
* **Client Key:** Upload a client key to authenticate the client with the server.
* **Server Address:** Enter the IP address or hostname of the OpenVPN server.
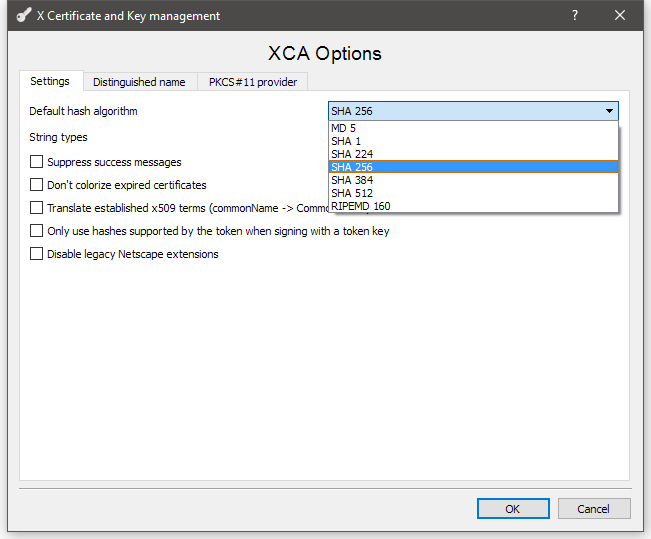
### Configuring Server Certificates
To configure server certificates, click on the "Certificates" tab on the OpenVPN settings page. Here, you'll find options to customize your server certificate settings:
* **Generate Certificate:** Generate a new server certificate or upload an existing one.
* **Private Key:** Generate a new private key or upload an existing one.
* **Common Name:** Enter the common name for your server certificate.
### Testing and Troubleshooting
After configuring your OpenVPN server, it's essential to test and troubleshoot it to ensure that it's working correctly. Here are some steps to follow:
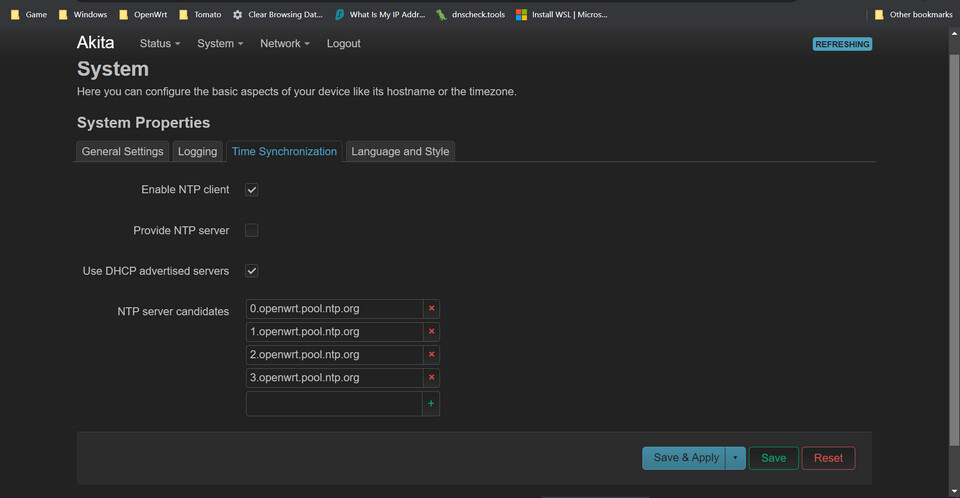
* **Verify Server Status:** Log in to the LuCI web interface and verify that the OpenVPN server is running.
* **Test Client Connection:** Use a client to connect to the OpenVPN server and verify that the connection is secure and working correctly.
* **Check Logs:** Check the OpenVPN logs to identify any issues or errors.
### Conclusion
Setting up an OpenVPN server with LuCI is a straightforward process that requires minimal technical expertise. By following the step-by-step guide outlined in this article, you can create a secure and encrypted connection to your network from anywhere in the world. Remember to test and troubleshoot your OpenVPN server to ensure that it's working correctly. With OpenWRT and LuCI, you can turn your router into a powerful network server that meets your security and convenience needs.
Related Post

Unraveling The Truth Behind Jonny Harris' Illness: Separating Fact from Fiction
The Dark Side of The Changeling: Uncovering the Haunting Truth Behind the 1980 Horror Classic

Zillow Iceland: A Comprehensive Guide to Iceland's Real Estate Market

Brotherly Love: The Rise of Taron and Joel Edgerton, the-operation Duo Tarento